Difference between revisions of "Central Machinery Horizontal Bandsaw"
(→Operation (pictures encouraged): Added photos) |
(Change Skedda field to Title) |
||
| (4 intermediate revisions by 2 users not shown) | |||
| Line 2: | Line 2: | ||
{{Required|Metal Shop Safety}} | {{Required|Metal Shop Safety}} | ||
| − | Central Machinery Horizontal Bandsaw, located on the north side of the metal shop, next to the cold | + | Central Machinery Horizontal Bandsaw, located on the north side of the metal shop, next to the cold saw. |
{{ToolPhoto|CMHorizontalBandsaw.jpg}} | {{ToolPhoto|CMHorizontalBandsaw.jpg}} | ||
| Line 14: | Line 14: | ||
The [[Metal Shop Safety Class]] is required to use this tool. | The [[Metal Shop Safety Class]] is required to use this tool. | ||
| − | No special PPE is required to use this tool. | + | No special PPE is required to use this tool, but the general shop requirements of safety glasses and closed-toed shoes apply. Safety glasses may be found on a shelf on the back side of the Tormach enclosure. |
| − | ==== Etiquette | + | ==== Etiquette ==== |
| − | If you are going to be spending a lot of time on the saw, write "horizontal band saw" in the | + | If you are going to be spending a lot of time on the saw, write "horizontal band saw" in the title field of your [https://asmbly.skedda.com Skedda] booking so other metal shop users will know. |
== Use Case == | == Use Case == | ||
The bandsaw is used for general-purpose metal cutting. It is suitable for bar, tube, and plate stock, but not for sheet stock. Used properly, it produces a fairly smooth, straight cut, which may be good enough for some applications, but you should not expect perfectly square cuts, so if precision is required, consider the bandsaw as a roughing step. | The bandsaw is used for general-purpose metal cutting. It is suitable for bar, tube, and plate stock, but not for sheet stock. Used properly, it produces a fairly smooth, straight cut, which may be good enough for some applications, but you should not expect perfectly square cuts, so if precision is required, consider the bandsaw as a roughing step. | ||
| − | |||
| − | |||
== Materials == | == Materials == | ||
| Line 39: | Line 37: | ||
The bandsaw uses pre-mixed blue coolant. You should find some between the bandsaw and the cold cut saw. If coolant levels are low and there's no pre-mixed coolant, please contact a steward. | The bandsaw uses pre-mixed blue coolant. You should find some between the bandsaw and the cold cut saw. If coolant levels are low and there's no pre-mixed coolant, please contact a steward. | ||
| − | == Operation | + | == Operation == |
| − | |||
| − | |||
| − | |||
| − | |||
| − | |||
| − | |||
| − | + | Reserve time in [https://asmbly.skedda.com Skedda] under "Metal Shop - General". Using the bandsaw during another Metal Shop reservation (eg. "Metal Shop - Welding Area 1") is fine, but please don't monopolize the tool if others need to use it as well. | |
| − | + | ===== Setup ===== | |
| − | + | * Lift the blade to the vertical position. Turn the lowering knob to fully stopped and turn on the brake (lever is perpendicular). | |
| + | * Place your material in the vise. Note that when you loosen the vise with the crank, it often doesn't move the jaw, so, you may have to manually move the movable jaw. | ||
| + | * For long material, support the end with the wooden support, or it is likely to come loose in the vise. | ||
| − | + | * Once your material is in place, lower the blade to the diagonal position. Because you set the brake, it should remain stationary there. Release the brake and turn the lowering knob to allow the blade to get close to your material so that you can line up the cut. | |
| + | * Adjust the throat of the saw so that it is not much wider than it needs to be to clear the stock during the cut. | ||
| + | * Raise the saw back above your stock, set the brake, and turn the lowering knob to fully stopped. | ||
| − | + | ===== Cutting ===== | |
| − | When the cut is finished, the machine will flip its own power switch to off. | + | * Turn on the saw with the switch. Let the blade get up to speed. Open the coolant valve enough that there's a good flow of coolant along the blade, but not so much that there's a good flow of coolant all over the floor. |
| + | * Release the brake, and turn the lowering knob so that it slowly lowers. | ||
| + | * When the cut is finished, the machine will flip its own power switch to off. | ||
==== Controls ==== | ==== Controls ==== | ||
<gallery> | <gallery> | ||
| + | File:Power switch.jpg|Power switch | ||
| + | File:Brake lever and lowering knob.jpg|Brake lever and lowering knob | ||
File:Throat adjustment.jpg|Throat adjustment | File:Throat adjustment.jpg|Throat adjustment | ||
File:Coolant valve.jpg|Coolant valve | File:Coolant valve.jpg|Coolant valve | ||
| − | </gallery> | + | </gallery> |
| − | |||
| − | |||
| − | |||
| − | |||
==== Settings and Adjustments ==== | ==== Settings and Adjustments ==== | ||
| Line 86: | Line 82: | ||
==== Common Problems ==== | ==== Common Problems ==== | ||
| + | ===== Coolant spilling ===== | ||
The coolant rests in a blue reservoir under the machine. If coolant is leaking all over the floor, it's possible that the reservoir has shifted so that it is not directly under the drain. Please reposition it to catch the outflow. | The coolant rests in a blue reservoir under the machine. If coolant is leaking all over the floor, it's possible that the reservoir has shifted so that it is not directly under the drain. Please reposition it to catch the outflow. | ||
Latest revision as of 14:06, 7 October 2024
 Members must complete the Metal Shop Safety Class before using this tool
Central Machinery Horizontal Bandsaw, located on the north side of the metal shop, next to the cold saw.

Safety
Universal Safety
- Be aware of your surroundings, especially when handling large materials.
- Do not approach anyone operating equipment. Stand patiently in their field of view.
Equipment-Specific Safety
The Metal Shop Safety Class is required to use this tool.
No special PPE is required to use this tool, but the general shop requirements of safety glasses and closed-toed shoes apply. Safety glasses may be found on a shelf on the back side of the Tormach enclosure.
Etiquette
If you are going to be spending a lot of time on the saw, write "horizontal band saw" in the title field of your Skedda booking so other metal shop users will know.
Use Case
The bandsaw is used for general-purpose metal cutting. It is suitable for bar, tube, and plate stock, but not for sheet stock. Used properly, it produces a fairly smooth, straight cut, which may be good enough for some applications, but you should not expect perfectly square cuts, so if precision is required, consider the bandsaw as a roughing step.
Materials
Acceptable Materials
All kinds of metal bar, tube, plate, or rod (properly secured) stock is acceptable. Stock should be thick enough to engage with three teeth of the blade at once. For sheet metal, use the Dayton Sheet Metal Machine instead.
Material Limits
This saw is capable of cutting large stock (slowly).
Consumables
The bandsaw uses pre-mixed blue coolant. You should find some between the bandsaw and the cold cut saw. If coolant levels are low and there's no pre-mixed coolant, please contact a steward.
Operation
Reserve time in Skedda under "Metal Shop - General". Using the bandsaw during another Metal Shop reservation (eg. "Metal Shop - Welding Area 1") is fine, but please don't monopolize the tool if others need to use it as well.
Setup
- Lift the blade to the vertical position. Turn the lowering knob to fully stopped and turn on the brake (lever is perpendicular).
- Place your material in the vise. Note that when you loosen the vise with the crank, it often doesn't move the jaw, so, you may have to manually move the movable jaw.
- For long material, support the end with the wooden support, or it is likely to come loose in the vise.
- Once your material is in place, lower the blade to the diagonal position. Because you set the brake, it should remain stationary there. Release the brake and turn the lowering knob to allow the blade to get close to your material so that you can line up the cut.
- Adjust the throat of the saw so that it is not much wider than it needs to be to clear the stock during the cut.
- Raise the saw back above your stock, set the brake, and turn the lowering knob to fully stopped.
Cutting
- Turn on the saw with the switch. Let the blade get up to speed. Open the coolant valve enough that there's a good flow of coolant along the blade, but not so much that there's a good flow of coolant all over the floor.
- Release the brake, and turn the lowering knob so that it slowly lowers.
- When the cut is finished, the machine will flip its own power switch to off.
Controls
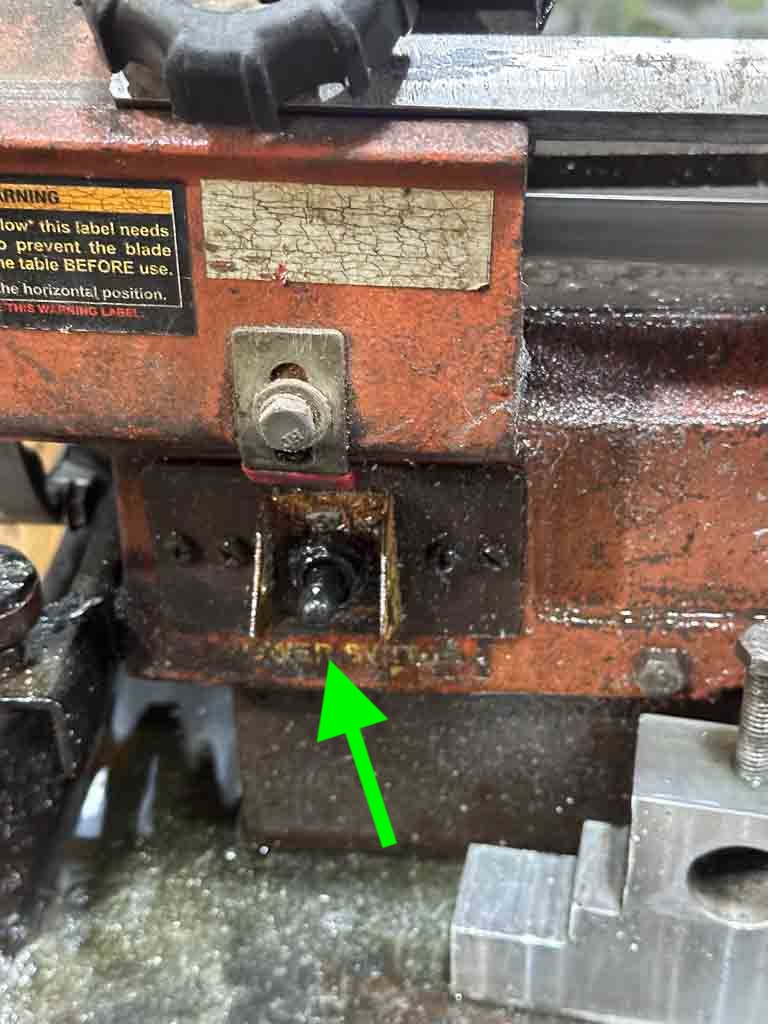
Power switch

Brake lever and lowering knob
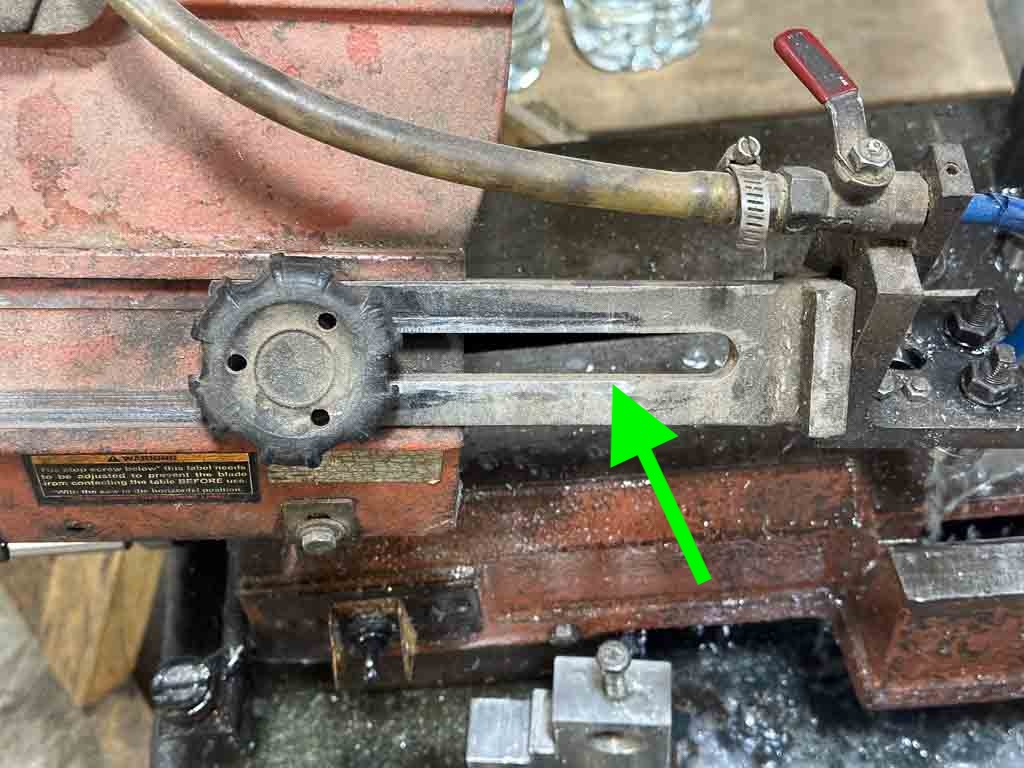
Throat adjustment
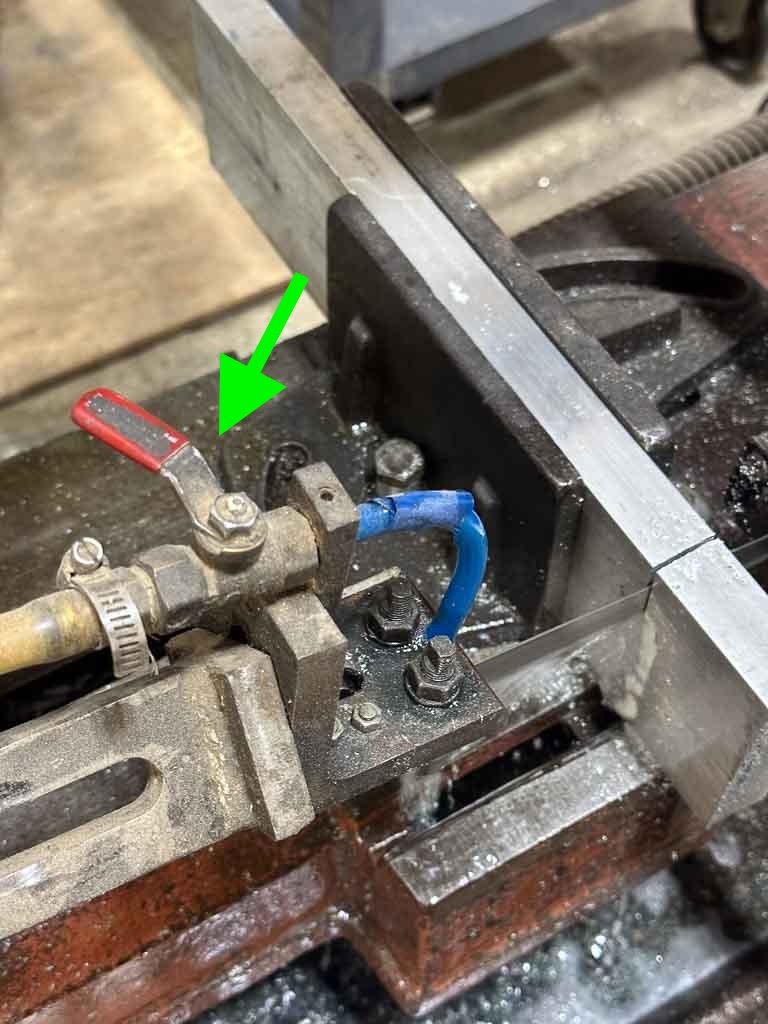
Coolant valve


Settings and Adjustments
Use the lowering knob to control the speed at which the blade descends. Harder material like steel should be cut more slowly than softer material like aluminum.
Cleanup
Universal Cleaning Guide
- Return the equipment to neutral.
- Sweep up any dust and debris around the tool, your table top, and the floor - both in the equipment area and your work area.
- Clear the floor of any tripping hazards, like power cords.
- Empty trash cans and dust collectors that are halfway full or more into the Asmbly dumpster behind the workshop.
- Leave the shop 110% better than you found it.
Tool Specific Cleaning Guide
- Use the metal shop general purpose shop vac to clean the machine and the area around it.
- If there's a lot of coolant on the floor, you can get most of it with the shop vac and wipe up the remainder with paper towels
Troubleshooting
Common Problems
Coolant spilling
The coolant rests in a blue reservoir under the machine. If coolant is leaking all over the floor, it's possible that the reservoir has shifted so that it is not directly under the drain. Please reposition it to catch the outflow.
If you are unsure, it is always best to contact a steward and fill out a problem report
Common Projects
Add your projects here!