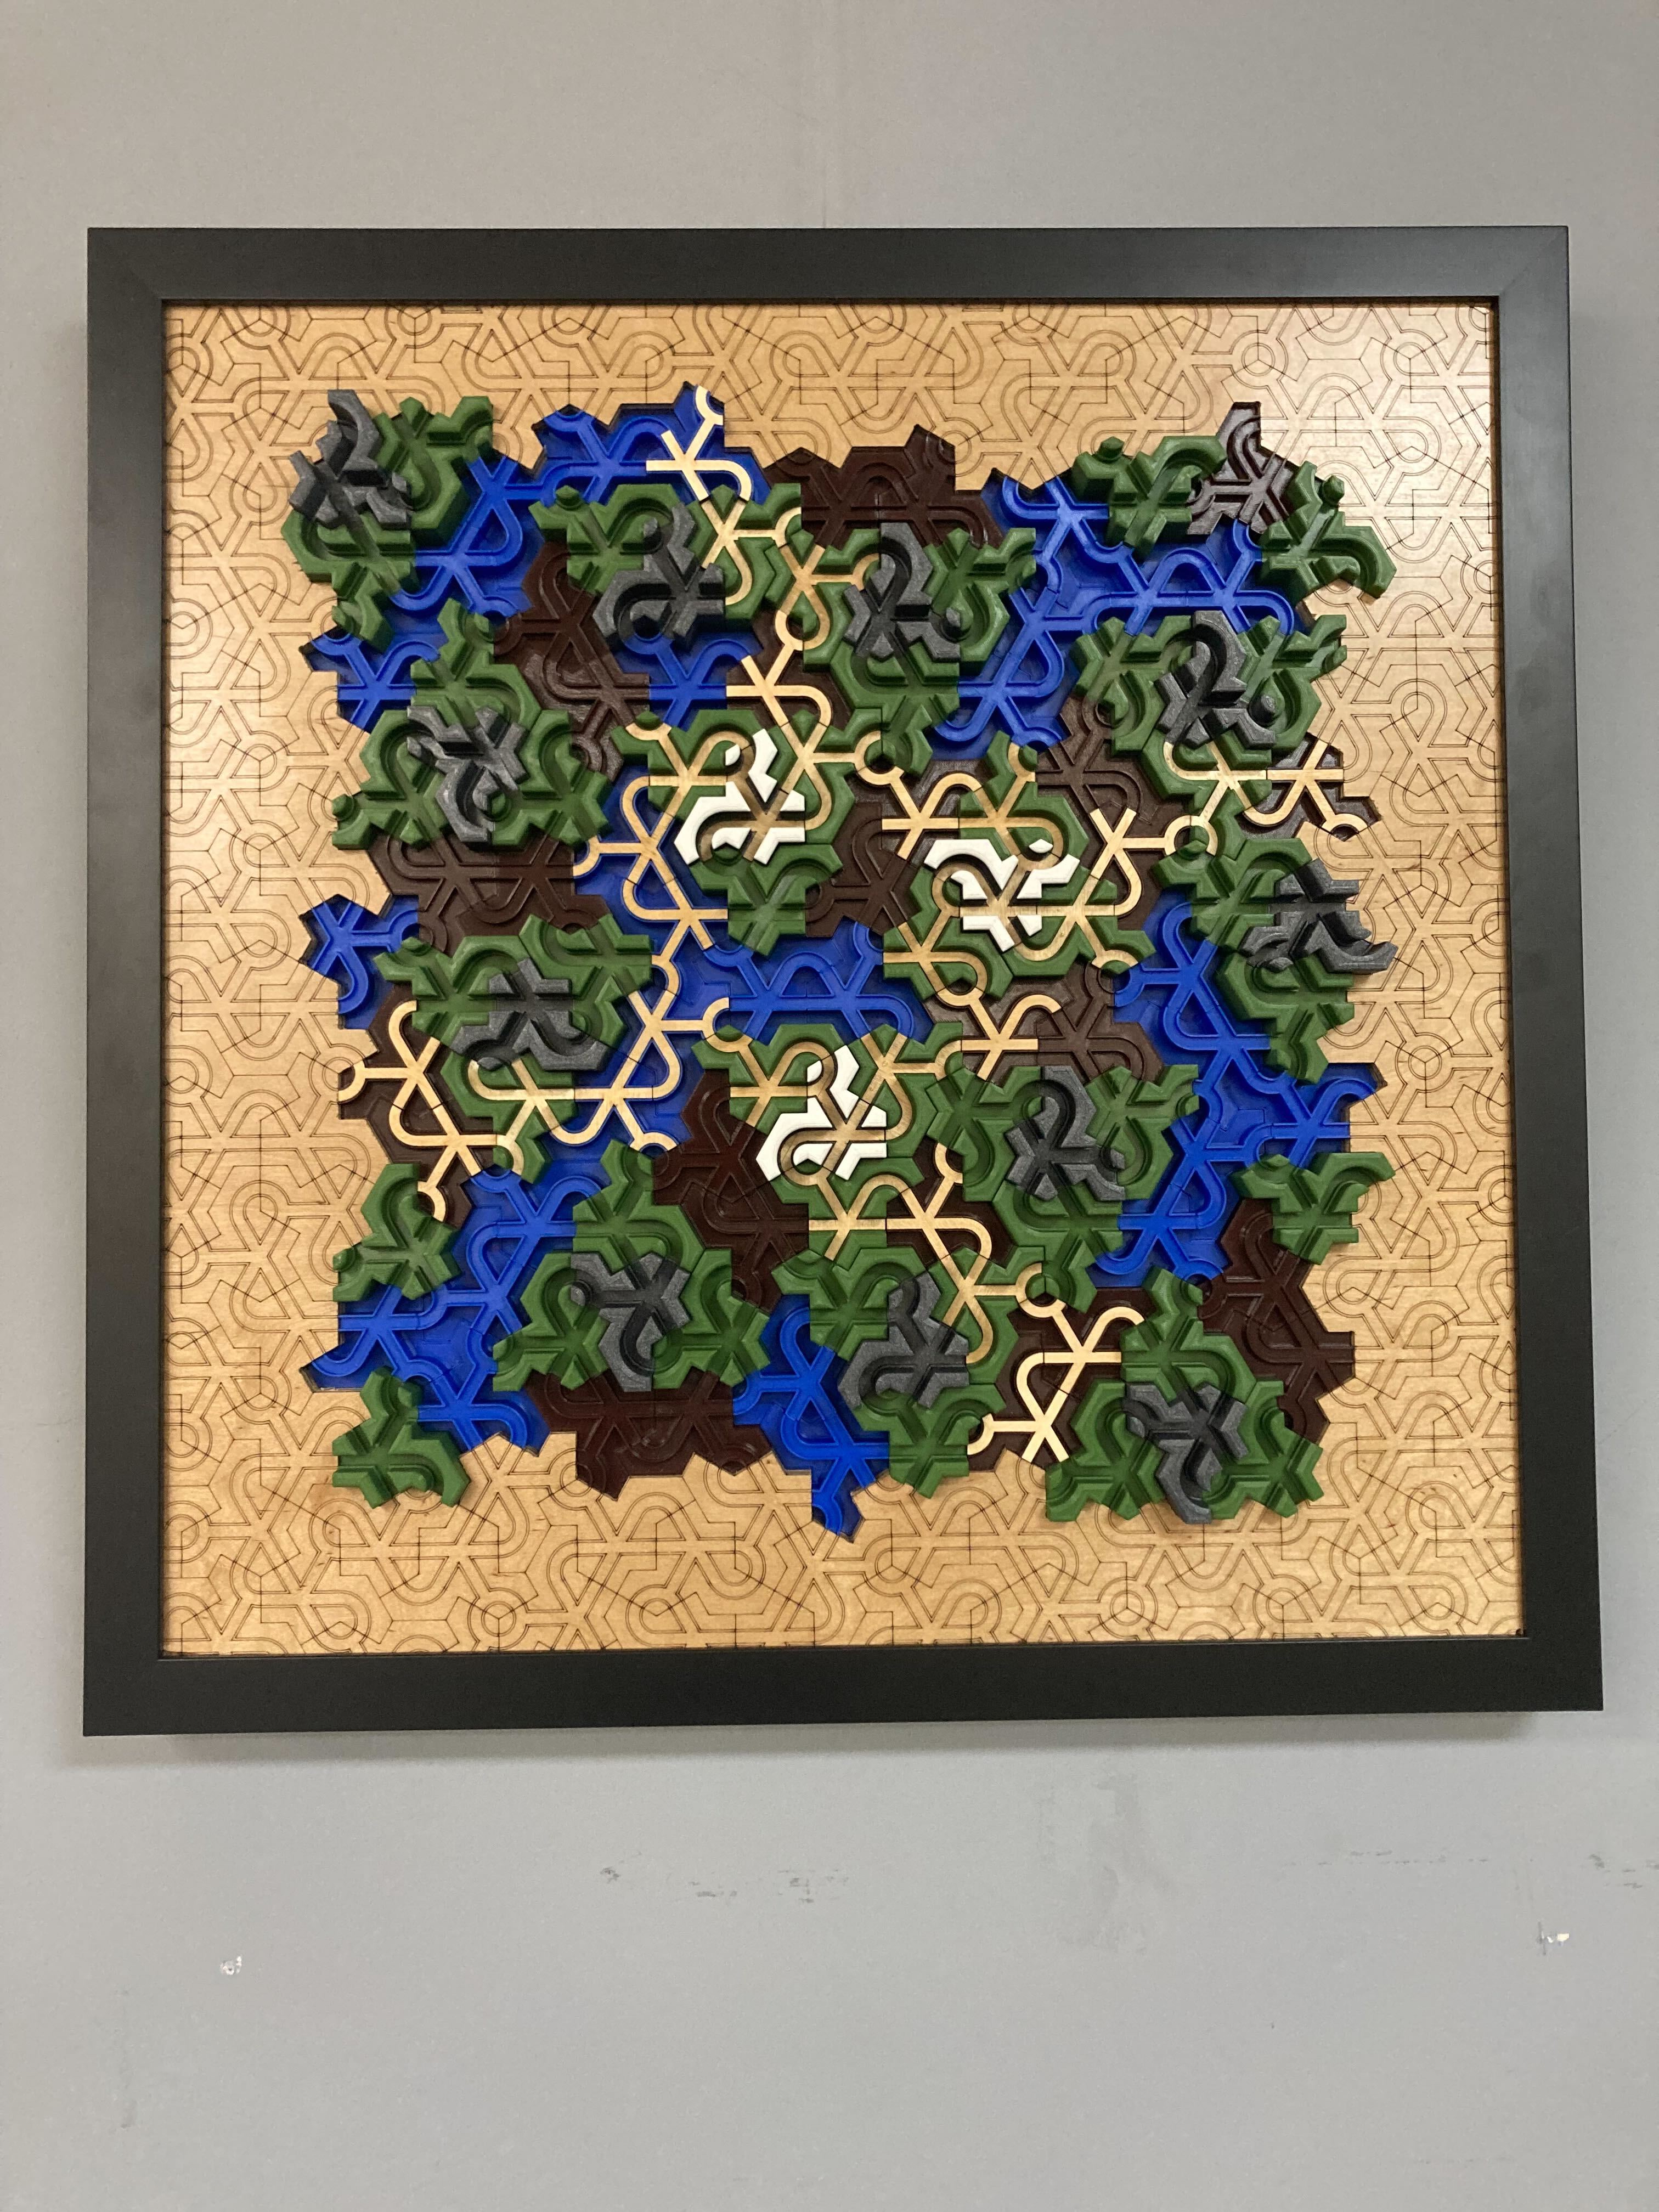
Interactive 3DP Wood Puzzle
This entry in the Maker 2x2 Competition was created by Brian Watt using 3D printing, CNC routing and laser cutting and etching.
"Several trails lead across the geography from one side to the other. Across rivers and valleys through hills and mountains the trail wanders. From the top to the bottom; from the left to the right they proceed. Present day jigsaw puzzle pieces connect by way of tabs and pockets. This puzzle has no tabs and pockets. Instead the pieces tile the surface in an irregular but beautiful pattern. The pieces are not glued down, but fit tightly against one another and the pocket to hold them in place. Visually choose a trailhead and follow it to its trailend. Let your eyes take a journey. It's an eye-candy hiking adventure." - Brian Watt
Concept
Watt's latest piece is a manifestation of their extensive hiking experiences and is inspired by the concept of an aperiodic monotile.
Between 2014 and 2021, Watt embarked on the challenging journey of hiking three national scenic trails: the 2650-mile Pacific Crest Trail, the 2200-mile Appalachian Trail, and the 3000-mile Continental Divide Trail.
In the months of March to May 2023, the Internet was captivated by the discovery of "An Aperiodic Monotile," [1] a groundbreaking find that could intricately tile a surface. While the tiling operation itself exists in two dimensions, Watt envisioned projecting it into the realm of 3D to represent the topography of hiking landscapes.
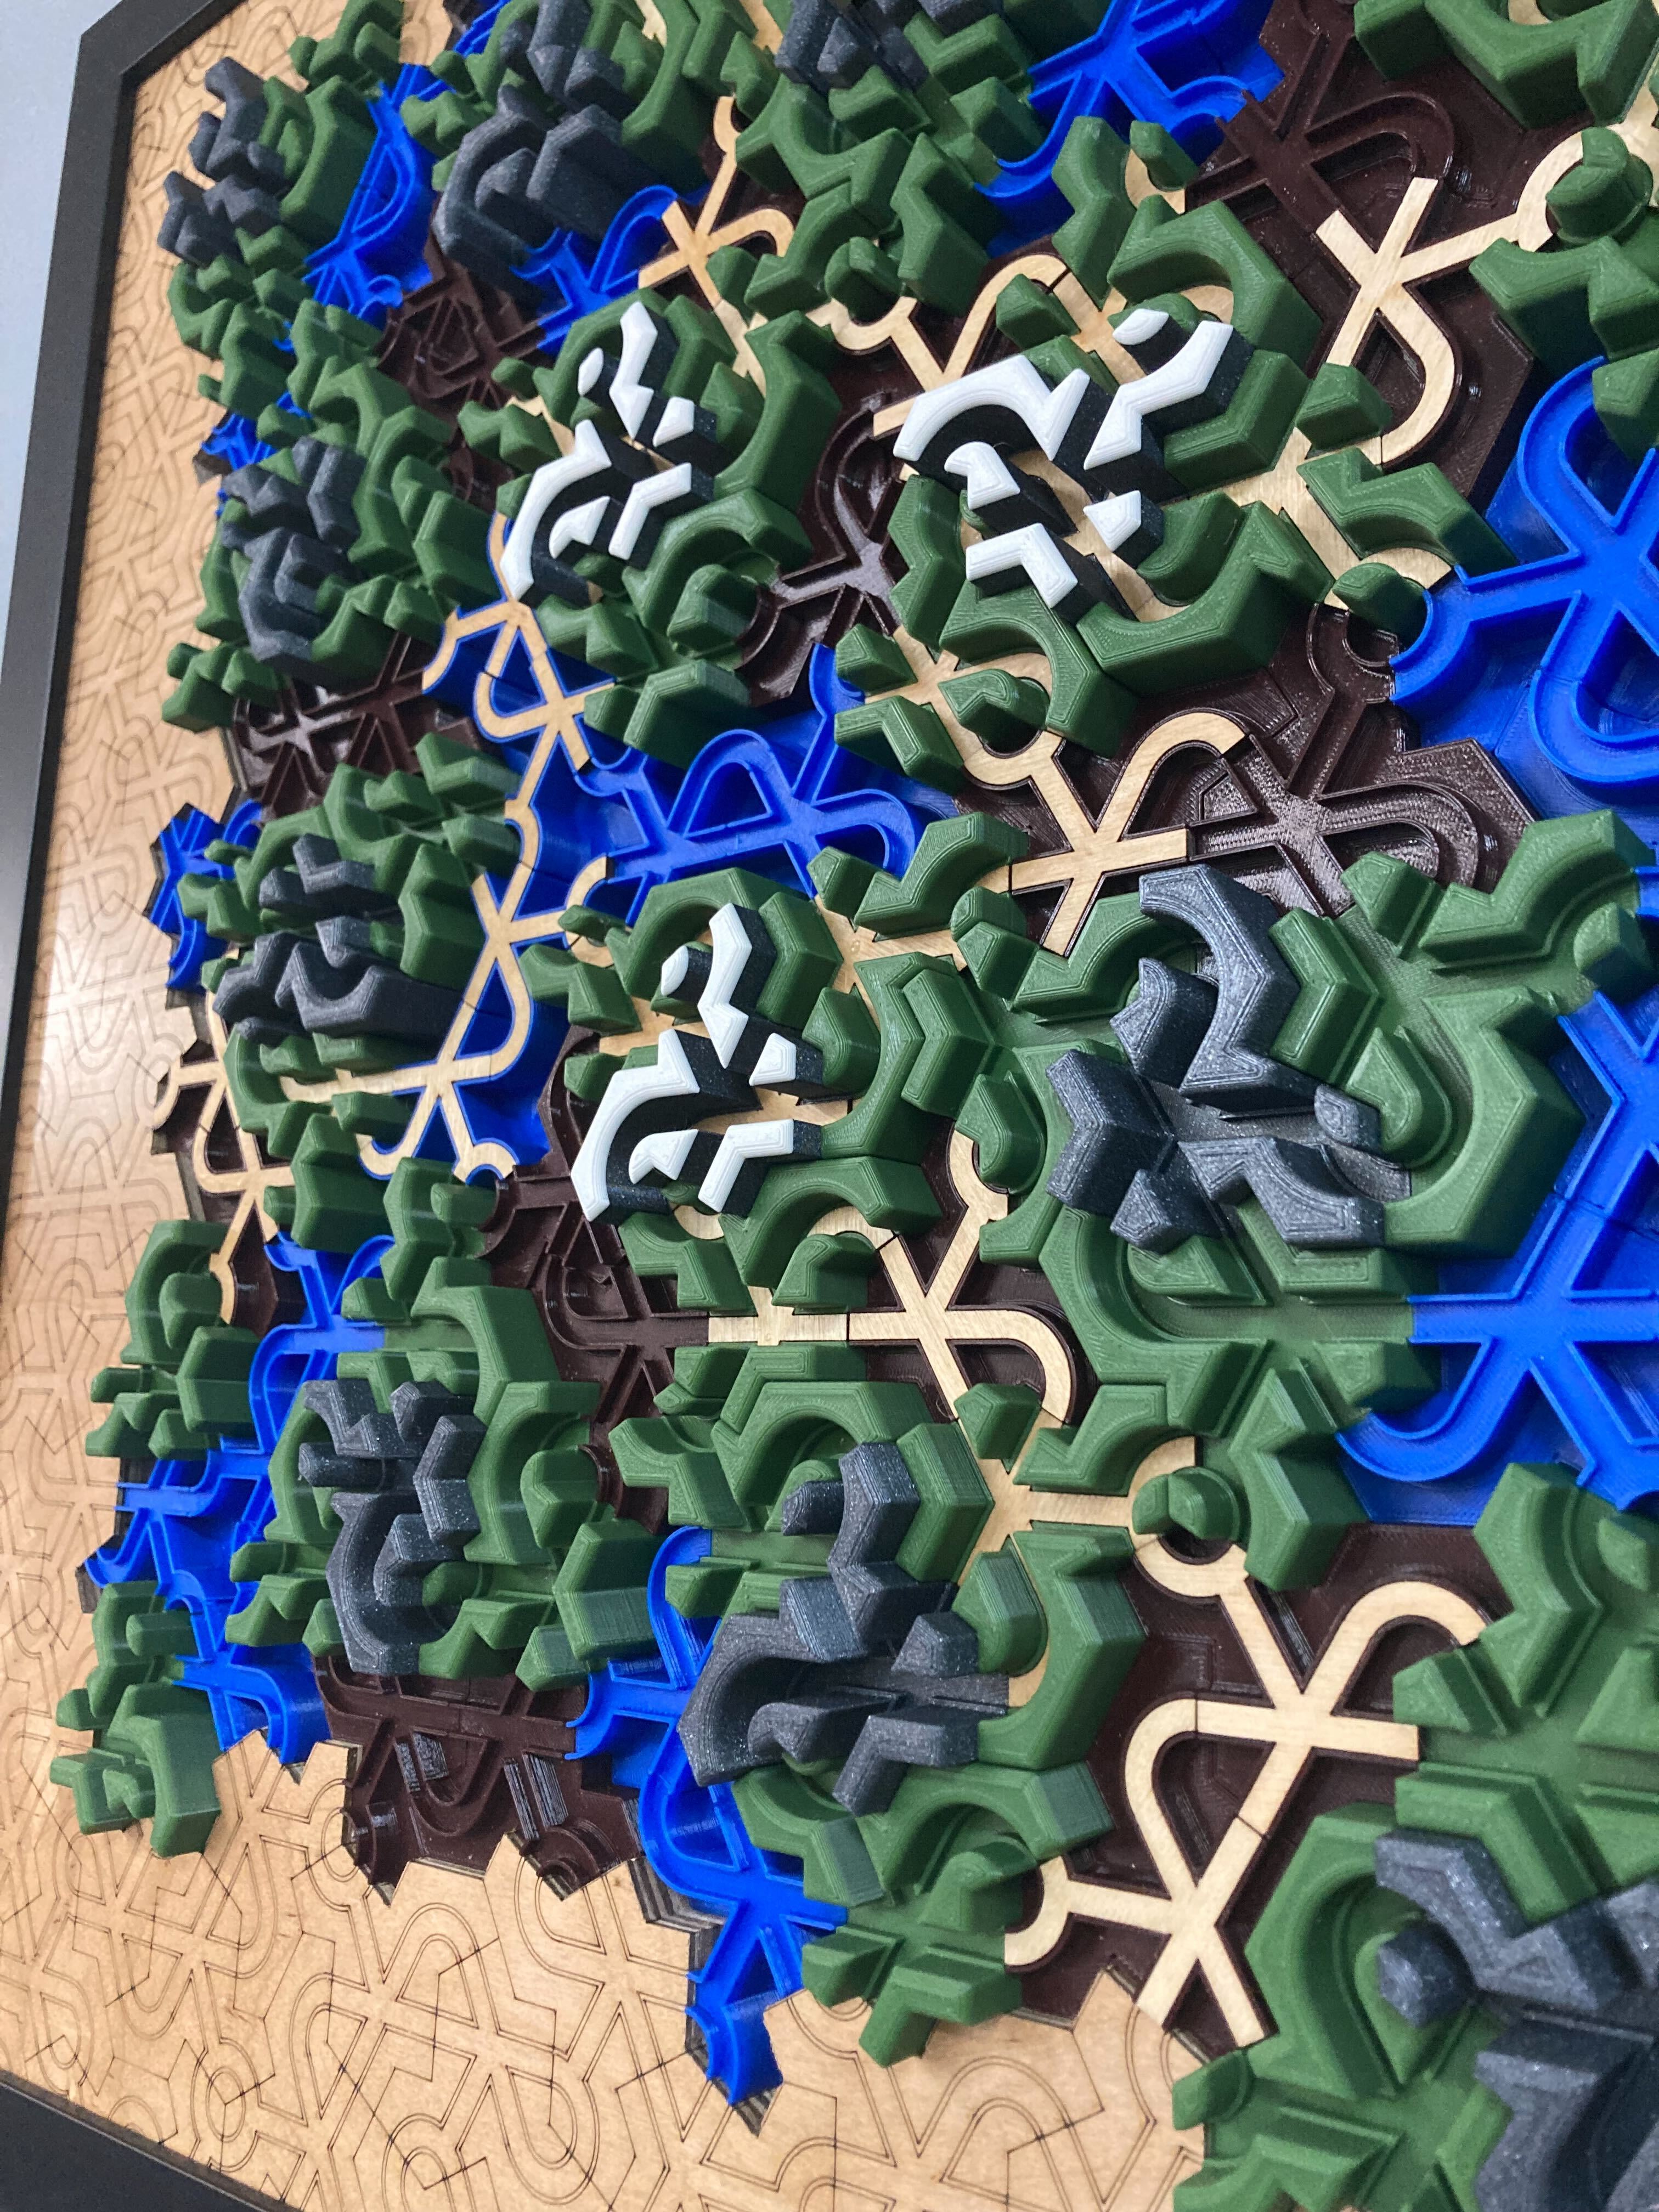
"Following my hiking theme I chose rivers to be shallow blue, valleys to be taller brown, hills to be peaked green, and mountains to be tallest gray," wrote Watt. "One of the Internet tiling pictures showed a pattern of pipes applied to the tile's surface shape [2]. The swerving pattern that the interconnected pipes formed reminded me of hiking trails, but they formed short closed loops. Instead I connected the pipes to extend them into a hiking trail."
Design
I am a FreeCAD CAD program user. I searched the Internet and found “The Hat monotile in FreeCad” [3]. Using this parametric 2D model as my basis I was able to create the various models for my river, valley, hill, and mountain tiles. In each I extruded from a 2D section to a 3D solid using four different heights representing the geography. The river, valley, and hill tiles are exactly the same aperiodic monotile “hat” shape. The mountain tiles are the mirror reflection of that shape. I added to each the interconnected pipes representing the trail. Each of the four unique tiles is a separate CAD model. Next using FreeCAD's Assembly workbench I assembled a complete puzzle design model into a single CAD model consisting of over 100 tiles. I use this assembly to generate the CNC router paths in GCODE that would create a pocket in the 2x2 board for the tiles. Finally I enhanced the assembly model by surrounding the puzzle tiles with surface tiles to form the laser etching pattern that extends out to the edges of the 2x2 board. From this I produced an SVG file that I used to laser etch the 2x2 board. Using one of the tile models I created another SVG file used to cut using step-and-repeat the small trail inserts.
Construction
3D Printing, CNC Routing, and Laser Cutting & Etching
Using the four different tile CAD models I printed over 100 tiles in four PLA-plastic colors on two Prusa 3D Printers over a few days. For three of the mountains I paused the print a few millimeters from the top, changed the filament to white, and restarted the print to create the snow-capped effect. Next I mounted the 2x2 board on the Laguna Swift CNC and ran the two GCODE files. One path hollowed-out the pocket via a 3/8” endmill. A second path precisely routed the pocket edges via a 1/8” endmill. This second path did dog-bone cuts at every corner to insure that the corners of each tile would fit into the pocket without binding. Then the 2x2 board was etched with the tiling and trails pattern on the Dorian Laser using Lightburn and an SVG file. The Lightburn's Cut and Print function was used to accurately align the laser etching with the already routed CNC pocket. Separately the trail inserts were laser cut from 3mm birch plywood, sanded, and sealed with polyurethane. Finally the 2x2 board was ready to be assembled. The tiles were placed in the recessed pocket. I was amazed how tightly they fit together – just like a puzzle! The trail inserts were press-fit into their tiles with similar precision. The 2x2 board was then mounted in the frame.
- ↑ “An aperiodic monotile” by David Smith, Joseph Samuel Myers, Craig S. Kaplan, Chaim Goodman- Strauss, [Submitted on 20 Mar 2023 (v1), last revised 29 May 2023 (this version, v2)], https://arxiv.org/abs/2303.10798, “A longstanding open problem asks for an aperiodic monotile, also known as an "einstein": a shape that admits tilings of the plane, but never periodic tilings. We answer this problem for topological disk tiles by exhibiting a continuum of combinatorially equivalent aperiodic polygons. We first show that a representative example, the "hat" polykite, can form clusters called "metatiles", for which substitution rules can be defined. Because the metatiles admit tilings of the plane, so too does the hat. We then prove that generic members of our continuum of polygons are aperiodic, through a new kind of geometric incommensurability argument. Separately, we give a combinatorial, computer-assisted proof that the hat must form hierarchical -- and hence aperiodic – tilings.”
- ↑ “Aperiodic Monotile Pipes” by Carlos Luna, published and updated April 9, 2023, https://www.printables.com/model/448090-aperiodic-monotile-pipes, “Decorated version of the Hat aperiodic monotile.”
- ↑ “The Hat monotile in FreeCad” by B. Nikolic Software and Computing Blog, April 5, 2023, https://bnikolic.co.uk/blog/linux/2023/04/05/hat-monotile.html, “The recent paper on the aperiodic monotile by Smith, Myers, Kapman and Goodman-Strauss discusses “The Hat” monotile with a delightfully simple geometry. It is very easy to construct in a parametric Cad program, for people interested here is a version in the FeeCAD.”

