Brent Clay Extruder HD
![]() Members must complete the Class before using this tool
Members must complete the Class before using this tool
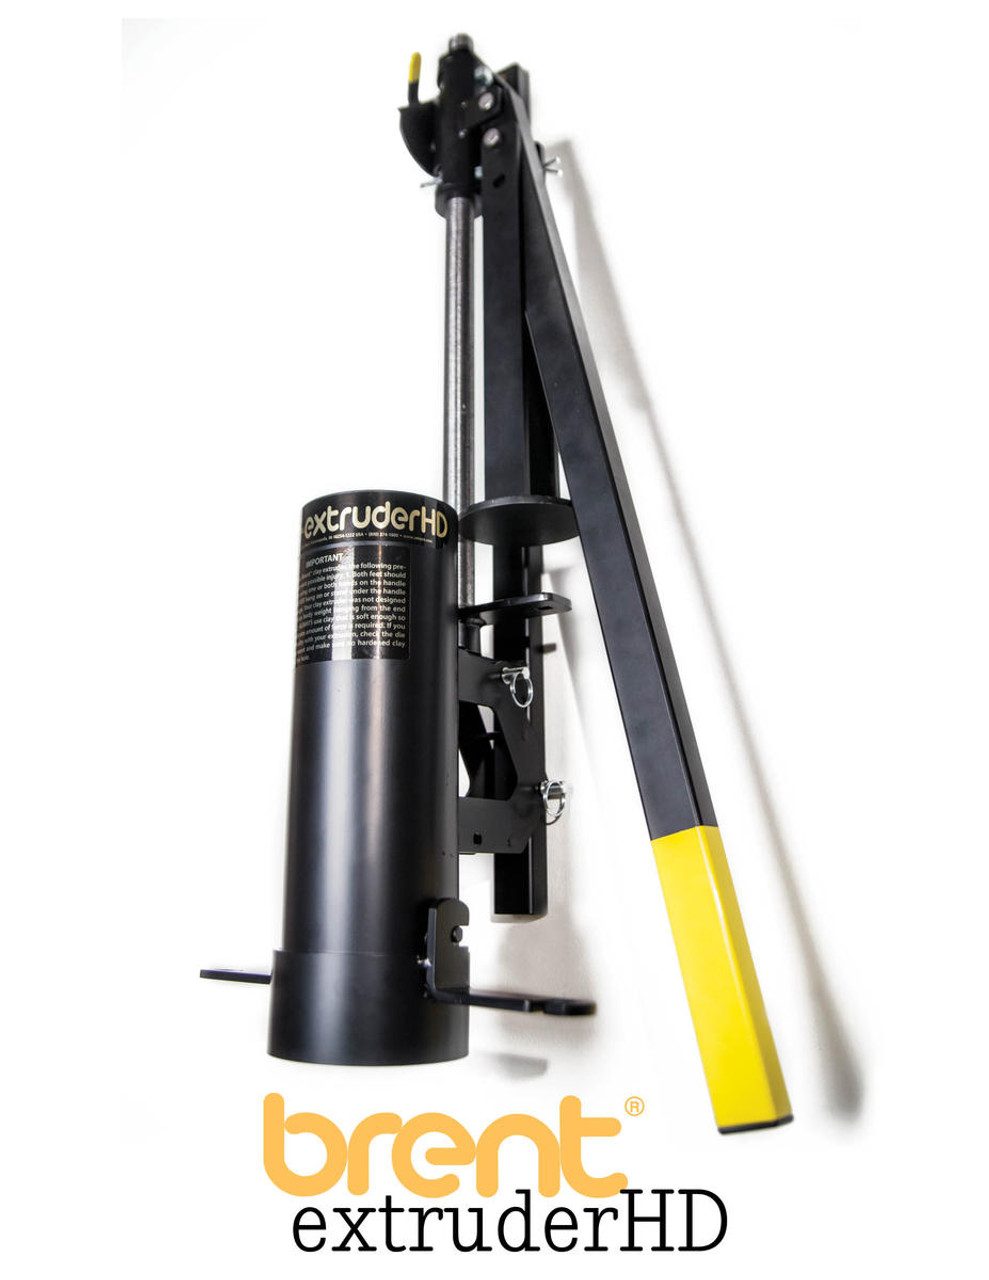
The Brent Extruder HD is a heavy-duty manual clay extruder designed for use in ceramic studios and classrooms. Manufactured by Brent, a well-known brand in pottery equipment, the HD model features a solid steel 4-inch diameter barrel capable of holding up to 10 pounds of clay. It is engineered for consistent, high-pressure extrusion and includes safety-focused elements like dual clutch plates for secure locking at any height and an EZ-Lock handle for smooth operation. Compatible with a variety of die sets, the Brent Extruder HD is widely praised for its durability, versatility, and performance in high-use environments
The Brent Clay Extruder is mounted on the east wall in the Ceramics studio, to the left of the garage door.
Safety
Universal Safety
- Be aware of your surroundings, especially when handling large materials.
- Do not approach anyone operating equipment. Stand patiently in their field of view.
Equipment-Specific Safety
Ceramics Studio Introduction (CSI) is required to use this tool.
Etiquette (if relevant)
Example:
If you are going to be spending a lot of time on the Extruder and the adjoining table, write "Extruding" in the title field of your Skedda booking so other Ceramic studio users will know.
Use Case
A clay extruder is commonly used to push out clay through a shaped die or nozzle, creating intricate and uniform shapes like coils, ropes, and tubes, saving time and effort in shaping clay pieces for ceramic art and other applications.
A great feature of this design is the assurance of equal pressure with any amount of clay in the barrel. You know how smaller extruders can exert unequal pressure, resulting in an uneven extrusion? That doesn’t happen with this heavy-duty piece of equipment.
Making Coils or Slabs
- Consistently shaped coils for:
- Coil-built pots and sculptures
- Decorative additions (ropes, ridges)
- Flat dies can extrude thin strips or ribbons for slab construction or trim.
Creating Handles
- Most popular use: Easily extrude uniform mug, pitcher, or teapot handles.
- Can shape round, oval, square, or custom profiles depending on the die.
Hollow Forms (Asmbly Does Not Currently Have Hollow Dies)
- With hollow dies and internal rods, you can create:
- Tubes for plumbing in teapots
- Hollow handles or spouts
- Structural elements in sculptures
Tiles and Architectural Components
- Extrude long strips for cutting into:
- Tiles
- Trim pieces
- Bricks or wall elements
Repetitive Design Elements
- Useful in production work: quickly replicate identical parts.
- Ideal for potters making batches of mugs, vases, or trays with consistent components.
Sculptural and Decorative Use
- Clay extrusions can be bent, twisted, and assembled for:
- Abstract or figurative sculptures
- Surface decoration
- Organic forms like vines, tentacles, or reeds
Making Test Tiles
- Extrude strips of clay to cut into uniform test tiles.
- Perfect for trying out new glazes or surface techniques.
- Easier and faster than hand-shaping individual tiles; ensures consistency for comparison.
- You can notch or stamp info directly on the tiles for recordkeeping.
Asmbly use: e.g. Skedda required, or part of an area.
Materials
Acceptable Materials
Plastic Clay Bodies
• Stoneware – Ideal choice; strong, durable, and good plasticity.
• Earthenware – Very workable and extrudes smoothly.
• Porcelain – Can be used, but tends to be stickier; wedge well and use dies with smoother surfaces.
Note: Clay should be well-wedged, moist but not too soft or wet, and free of air pockets.
Paper Clay
• Extrudes well and is lightweight.
• Great for sculptural or mixed media projects.
Reclaim Clay
• As long as it’s properly wedged and free of debris or lumps, reclaim is fine.
• Avoid overly stiff reclaim unless you're using a very robust extruder.
Colorant- or Stain-Mixed Clay
• Mason stains or oxides mixed into clay bodies for colored extrusions.
• Perfect for making layered or patterned handles or tiles.
Additive Clays
• Clay bodies mixed with grog, sand, or fine fibers
• Helps with strength in extruded forms, especially sculptural work.
| Material | Reason |
|---|---|
| ❌ Extremely hard or dry clay | Can break dies or jam the extruder |
| ⚠️ Very soft/sloppy clay | Will slump or extrude inconsistently |
| ❌ Clay with large grog (coarse sand) | Wears down dies, may clog |
| ❌ Foreign objects in reclaim | Stones, tools, or debris can damage mechanism |
| ⚠️ Porcelain with no grog | May be sticky and hard to clean; use with care |
Material Limits
Extruder barrel has a diameter of 4” and max capacity of 10 lbs of clay.
Operation
Inserting Clay
• Load with up to 10 lbs of clay: Fill the barrel completely to avoid air pockets and ensure an even pressure
• Wedge your clay first to eliminate air, then push it into the barrel with a plunger or firm hand to level it.
Setting a Die
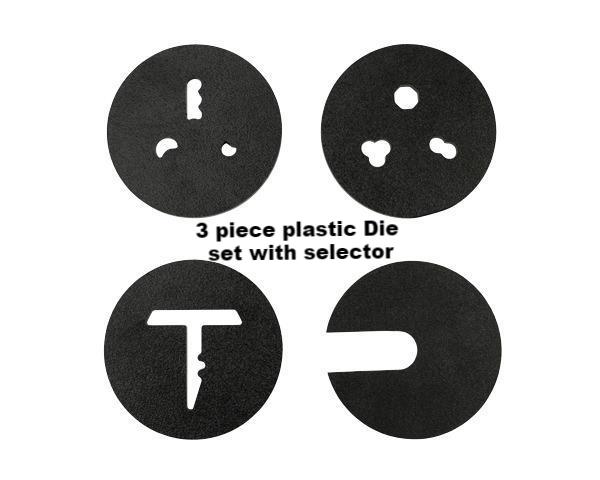
- Choose your die and set the selector:
- There are a variety of die plates to choose from
- Some dies require use of the selector plate to isolate the desired extrusion shape
- Once you have selected your desired extrusion shape, place the selector plate on top of the die, aligning the open section of the selector with your desired extrusion shape
- All other extrusion shapes should be covered by the selector plate
- Load the end cap
- Place the rubber gasket ring into the base of the end cap
- Place the die on top of the rubber gasket ring
- Place the selector plate on top of the die
- Carefully attach the end cap to the barrel of the extruder, ensuring selector plate remains in its desired position
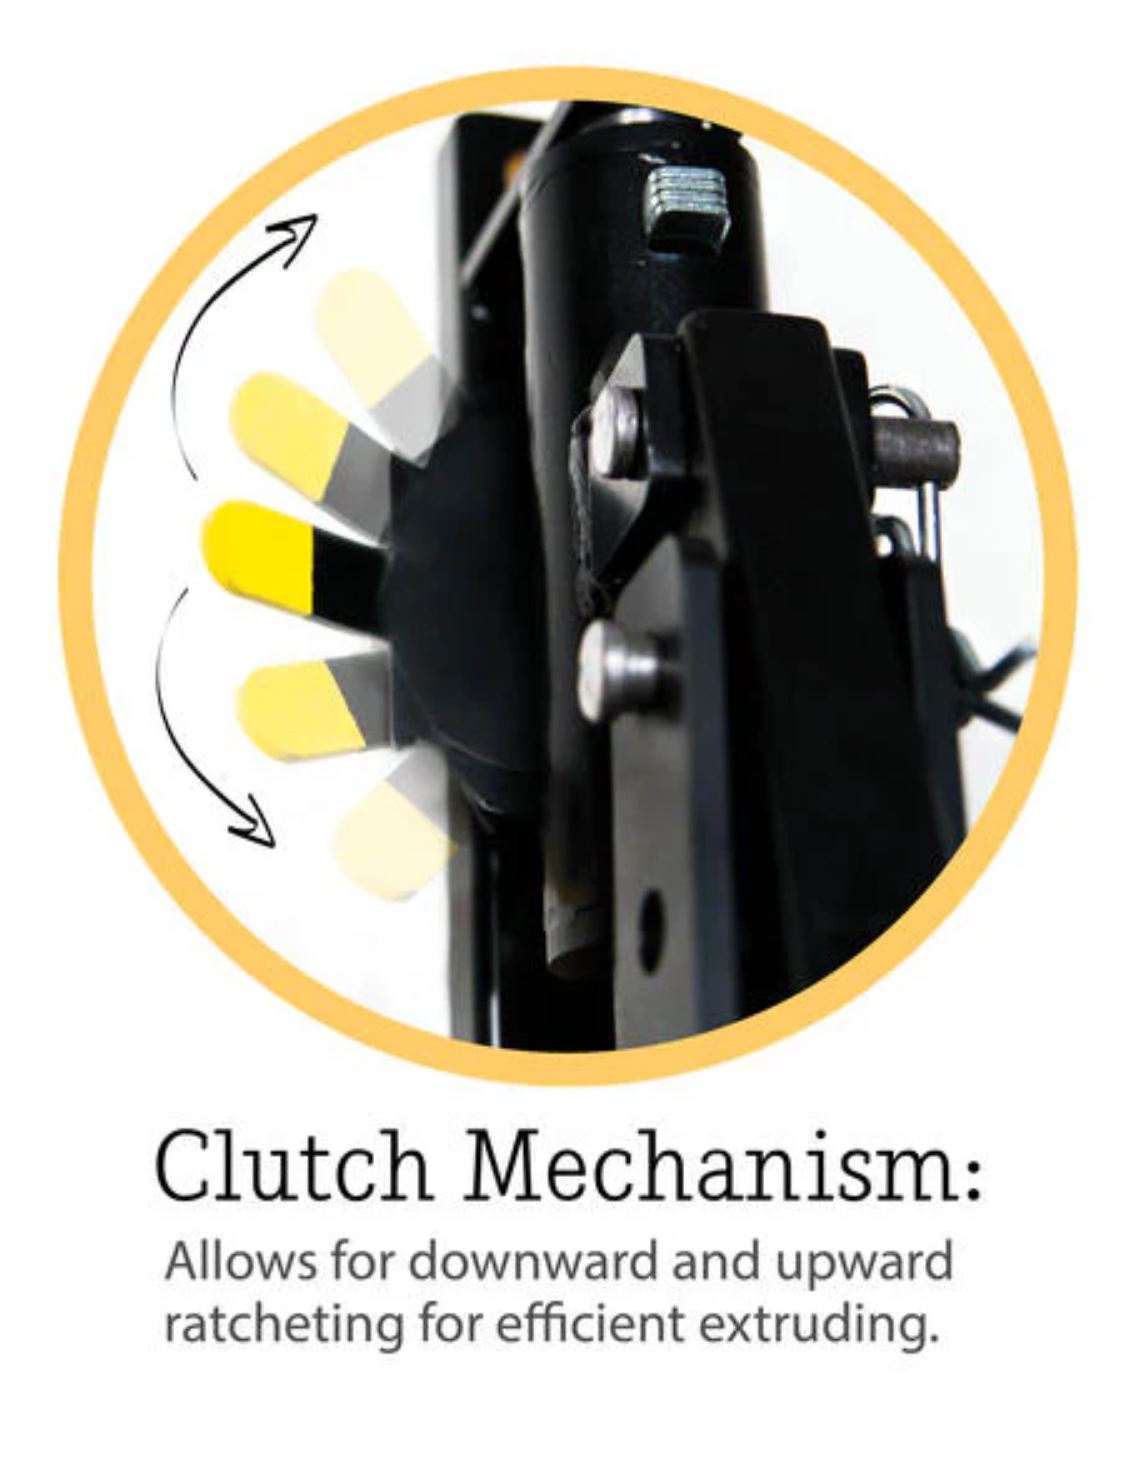
Using the EZ Lock Handle & Clutch Mechanism
Locked (Down Position)
- Function: Engages the clutch plates
- Use: This is the extruding mode. When the handle is down and locked into this position, it applies even pressure to push the clay through the die.
- Result: Clay is extruded as you pull the handle down.
Neutral (Middle Position)
- Function: Disengages both clutch plates
- Use: This position releases pressure and allows the handle and plunger to move freely without engaging the clay.
- Result: You can move the handle up or down without pushing clay — useful for repositioning or resetting.
Freewheel (Up Position)
- Function: Allows quick upward motion without resistance
- Use: When you need to quickly lift the plunger rod to reload the barrel or remove clay, this position is used.
- Result: Lets you crank the handle back up with minimal resistance — not for extruding.
Extruding Clay
- To push clay, lock the clutch into the down position
- Pull the handle down steadily and smoothly; the plunger will push clay through the die.
- Collect clay coils or extruded shapes as they come out below.
- Feed more clay as needed, always refilling before the barrel runs low for best consistency.
Cleanup
Barrel Removal + Cleanup
• Pivot down and remove barrel using the pivot pins.
• Empty clay remnants, and clean both barrel and die thoroughly.
• Store dies
Tool Specific Cleaning Guide
- What to clean
- How to clean
- Where to dispose of waste
Example for Miter Saw:
- Brush off top surface
- Brush around machine
- Clean infeed and outfeed tables
- Sweep floor
- Wall vacuum hose works well
Resources
Manual
Discourse Links
SIG Information (if relevant)
External Resources
Troubleshooting
Common Problems
Detail what the problem is and how to fix it
If you are unsure, it is always best to contact a steward and fill out a problem report
Common Projects
Maintenance
This tool is owned by Asmbly Makerspace for the use of its members. Please submit a problem report if maintenance is required.


